Category Archives: Geology

20 Years Since Northridge

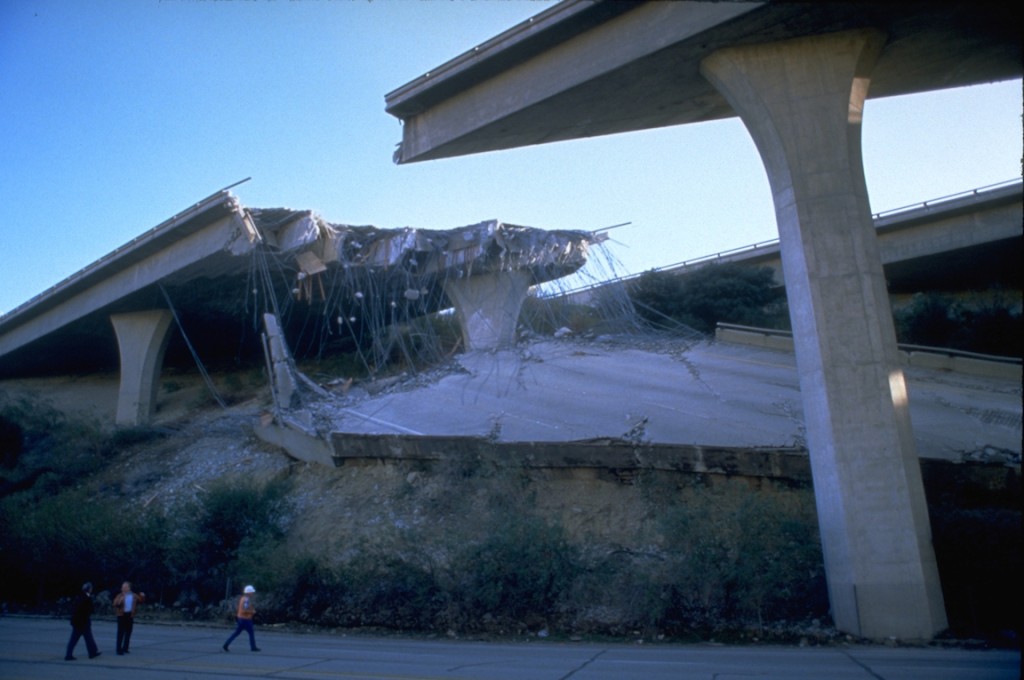
FEMA_-_1807_-_Photograph_by_Robert_A._Eplett_taken_on_01-17-1994_in_California

Today marks 20 years since the famous Mw 6.7 Northridge earthquake.  In the early morning hours the earthquake hit the San Fernando Valley region of California and caused massive destruction.  In the 20 seconds of shaking there were around 60 deaths and over 8,700 injuries.

While the magnitude is strong, it really isn't that impressive.  What is impressive about this event is the accelerations and velocities involved.  The ground acceleration was up to 1.8g (~54 feet/second^2) and the peak ground velocity was the highest ever recorded at just over 6 feet/second (1.83m/s)!

Without going into all the details of the earthquake that are easily available, I would rather provide a news clip of the evening after the event and ask a question.  If you live in an earthquake prone region, do you have a disaster plan?

As you can see in the video, when gas mains are snapped and fires start there are only minutes to evacuate.  Take some time and put together a survival bag as well as talk to your family (especially children) about what to do during a disaster.  Even if you don't live in an area with significant earthquake hazard this is important to do with the upcoming severe weather season.  Some helpful links are provided at the bottom!

http://youtu.be/8Xg_mhA4ffA

Links

American Red Cross Survival Kit
Ready.gov Survival Kit
CDC Earthquake Health Information
FEMA Ready.gov  Earthquake Information
Earthquake Safety at Work

Exploding Ice and Rock - Booms Heard a Result of "Cryoseisms"

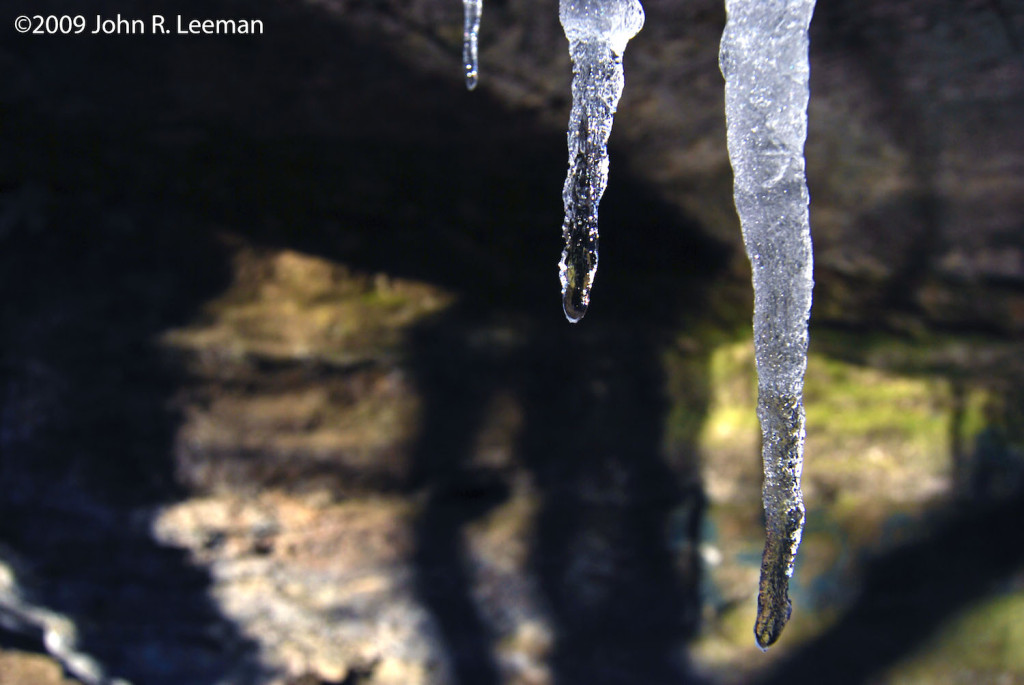
Ice Hanging From Rock

UPDATE 1/13/14: Frost-quake creates 100ft long crack here.

Over the past few days (starting around Christmas eve), there have been reports of large booming sounds associated with minor ground shaking across the northern states, as well as in Canada.  The Toronto events have a nice string of tweets that are associated with them as well.  Are these really explosions? Earthquakes? Sonic booms? The truth, as it turns out, is a rare event that produces what are known as "cryoseisms".  Oddly enough, these "frostquakes", as they are commonly known, have been discussed in the literature since about 1818!  Having a background in both meteorology and geophysics, cryoseisms are just one example of how closely related to two fields are.

So, what happens to produce such loud and potentially startling events? It's all about ice.  Cryoseisms occur when there are seasonal frost conditions, no insulating blanket of snow, lots of rain/thaw to saturate the ground, and a sharp drop in temperature.

Surface water penetrates into sufficiently permeable soil/rocks, but then is rapidly frozen with a fast drop in surface temperature.  Normally temperature drops slowly enough that the ice gradually freezes, giving the surrounding soil/rock time to adjust.  When really fast temperature drops occur and freezing is rapid, the surrounding areas are stressed by the expanding force of the ice.

The freezing process is actually a very powerful mechanism, and is one of the geologist's favorite ways to explain physical weathering of large boulders.  Freeze/thaw cycling has even been used as a quarrying technique in granite!

Expansion during this rapid freezing of infiltrated ground water stores energy in the surrounding rock/soil, like a spring, until..... BAM! Failure occurs in much the same way faults fail.  Here the driving force isn't tectonic though.

Cryoseisms can do light damage to structures in the immediate vicinity, but their intensity falls off very quickly with distance.  For the seismology buffs out there, the zero focal depth produces lots of surface waves, but these events are generally not recorded on seismic networks.

Want to know more about cryoseisms? The literature isn't too robust, but check out Barosh (2000), Nikonov (2010), and Voss & Herrmann (1980) for some starting points!

*Cryoseism is also used to refer to earthquakes at the base of glaciers as well.  That's a whole other story for another day!


Favorite Books and Products of 2013

This year, like every other, was full of lots of great, okay, and no so good things. Being the list-oriented person that I am, it seemed appropriate to list out great things of the year. While there were many things that could go here (favorite trips, etc), I thought keeping with the orientation of the blog we should look at the favorite books and products of the year. Not all of these came out in 2013, but I discovered them all in 2013. Without further delay:

Favorite Books

In Suspect TerrainIn Suspect Terrain - John Mcphee
This book reads like a novel, but gives massive geologic context. It is part of a series that I will continue reading this year. If you are curious about the geologic history of the east, this gives a driving cross-section and great context.

Scientific PresentationsThe Craft of Scientific Presentations - Michael Alley I was fortunate enough to attend my 2nd Michael Alley workshop this year and gained much from both it and his book. Dr. Alley is a phenomenal person that is full of energy. His presentation advice helped me give an AGU talk, as well as successfully pass my candidacy exams (those should probably be posts).

EE 101Electrical Engineering 101 - Darren Ashby I've seen this book for quite some time, but decided to give it a read and see what it was like. Overall it was a great intro to electronics for new-comers and a good review for those who, like me, perform lots of electronics hobby work, but are not professional engineers. A few of the analogies were somewhat wrong at anything more than the basic level, but that's what they were there for.

GuesstimationGuesstimation: Solving the World's Problems on the Back of a Cocktail Napkin - Lawrence Weinstein A fun read that helps speed up your order of magnitude estimation capabilities. These were great lunch-hour exercises.

Command and Control


Command and Control: Nuclear Weapons, the Damascus Accident, and the Illusion of Safety - Eric Schlosser Having lived in Arkansas for most of my life, this book was of interest to me. I was quite surprised at just how unsafe much of the nuclear arsenal was and how many close calls we have had.

Feynman's RainbowFeynman's Rainbow: A Search for Beauty in Physics and in Life - Leonard Mlodinow Recommended to me by a professor in the department, this was a quick read that gave an outside look at the life of Richard Feynman from one of his colleagues. A must for any Feynman fan or general physics reader.

Data PointsData Points: Visualization That Means Something - Nathan Yau Another stellar book from Natan Yau of flowingdata.com. Great advice on presenting complex data in an easy to digest form.

Zen


Zen and the Art of Motorcycle Maintenance - Robert M. Pirsig Sometimes I will read a classic, and this did not disappoint. Very quotable and very enjoyable.


Favorite Products

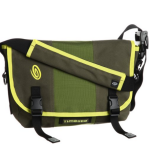
Timbuk2Timbuk2 Classic Messenger Bag I didn't want to carry my leather briefcase throughout Italy and Holland this summer, so I ended up with this bag. I can't say enough about how durable it is and what a great traveling companion it makes. I have notice many geoscience folks carry these and believe that they should sponsor AGU.

Blackwing 602Palomino Blackwing 602 Pencils A post in the "How I Work Series" mentioned these and I must say that they are the darkest pencils I've seen. I generally use pen in my notebooks, but these are great replacements.

Beaglebone


Beaglebone Black This is the new small/embedded computer design. I'm implementing them in my infrasound bucket project and in a few others.

Hakko


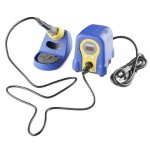
Hakko FX-888D Soldering Station This is my new go-to soldering station for those of us on a budget.


USRP Software Defined Radios While expensive, I got to use some of these in a recent project and make a radar out of them!
USRP

What did I miss?

Fun With Office Supplies - Geometric Cohesion and Staples

After the small rash of tape theft resulting from my suggestion at a talk that the audience go home and unroll scotch tape to see the resulting electrical dischange (which deserves a blog post soon) it's time for another attempt to make Swingline Co. stock soar.

In a recent Physics Today article "Geometric Cohesion in Granular Materials", Scott Franklin of the Rochester Institute of Technology showed some very interesting data regarding how the shape of a material effects how likely it is to stay together as a coherent mass.  Before we delve into the article though, let's talk about cohesion in general.  Then we can come up with a couple of fun experiments that you can do at home.

Cohesion is just the tendency of a material to stick together.  This is different than adhesion though.  Consider a water drop on a dish in your dish drainer.  The water drop is sticking to another material (the ceramic) which is adhesion.  The water drop is also a coherent mass; water molecules are sticking together to form a raised droplet on the surface of the plate.  In essence the water is 'sticking to itself', which is due to electrostatic forces of water being a polar molecule.  Electrostatic forces give water a property of surface tension that causes lots of wonderful things that can make up a whole other post at some point.

Other things can cause a material to stick to itself though.  Remember playing the old pickup sticks game as a kid? The object was to extract a stick from a pile of sticks on the table without disturbing other sticks.  This turns out to be pretty challenging.  Your pile of sticks appeared to be stuck together or interconnected, which is cohesion in a macroscopic or broad sense.  In the case of the sticks electrostatic forces certainly aren't the cause.  Electrostatics forces are relatively weak, and the sticks don't have enough mass for their gravitational attraction to cause this cohesiveness of the pile.  What is the mysterious factor then? It's just their shape. When objects act cohesive because of their geometry or shape it's called geometric cohesion.

First grab a couple of tablespoons of sugar, place it in a small container (an old medicine bottle works great) and turn the container upside down on the table.  Now remove the container... the sugar spreads out in a small pile.  The roughly spherical grains of the sugar don't stick together that well and the pile isn't very tall.  The angle of the pile from horizontal is called the angle of repose, and is around 30-35 degrees for lots of things.  My pile of sugar sat at about 30 degrees.  The angle of repose really tells us how hard it is for the grains to slide past one another.  If it's easy, the pile is a very low angle, and if the pile is made of large, angular hunks of rock, it becomes more steep.

The angle of repose can even be thought of as a proxy for the coefficient of static friction, or how hard it is for the grains to move past each other from a dead stop.  A mathematical relationship can be derived from some geometry, but it turns out the tangent of the angle is about the coefficient of friction. So the tangent of 30 degrees is about 0.6, which is the general number for static friction of lots of materials.  This result means all is well in the world of static newtonian physics and we can think about something more interesting than approximate spheres of sugar.

What about rods? Going back to our game of pickup sticks, the shape of the long, narrow rods seems to be the main factor holding things together.  It's easy for lots of objects to interact and become 'locked together'.  Who cares about rods locking together? Manufacturers often have automated assembly machinery that may have large hoppers of screws, and when things get locked together it costs money.  The long narrow shape of screws can jam hoppers in seconds and hold up the entire line.  While not many people have a pile of tiny screws at home, I bet you have staples.

Staples are a funny shape really.  Standard office staples are about 7mm along the long upper shank and  around 5mm at the two barbs.  These measurements give the staple a barb to shank ratio of about 0.7, which as it turns out, is a governing number describing how well staples can stick together.  Franklin's group did a whole series of experiments with staples of different barb ratios and found that staples with a ratio near 0.4 were the most cohesive.  Even though our staples aren't the ideal ratio let's repeat the sugar experiment.

Using a stapler, eject a bunch of staples into the same container (or one with a slightly larger mouth if you have it).  Now shake the container up for a bit, turn it upside down, and remove the container.  This time the mass didn't spread like the sugar, but retained the relatively sharp edges of the container shape.  Retention of shape tells us that the staples are cohesive, and their high angle of repose means that the coefficient of static friction is very very high.  Franklin's group is currently seeing how strong these piles are by pulling on the ends, but they are actually pretty robust.
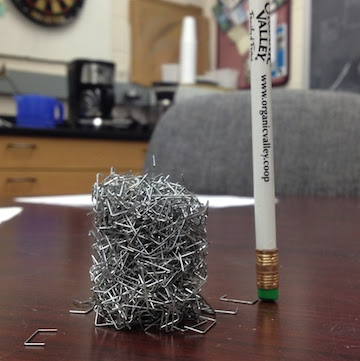
The big question is why does any of this matter other than being interesting? Well, cohesion is a big deal when we study soils.  Cohesion can determine if the ground can support a building, if a landslide is due, or if the machine powder coating your morning doughnuts gives you a plain doughnut.  While some of these are more life threatening that others, it's import to study cohesion to keep tabs of impending disasters, especially avalanches and landslides. I know that there aren't that many staples in soils generally, but there are clays which are shaped like plates.  Different minerals/materials in the soil with different shapes can greatly change the strength of the soil and how likely it is to slide as a mass.

Teaching Field Camp Week 2 - Ground Penetrating Radar

Week 2 of camp for the geophysics students was at the new University of Oklahoma Bartell Field Camp. Students were split into three groups and each group rotated through three main geophysical methods: gravity, magnetics, and ground penetrating radar (GPR).  I was responsible for the GPR all week, but we'll briefly discuss everything they did and some problems we had along the way.

Monday the students went on an intro field trip to learn about the geology of the area.  First students walked up the road to 'high camp' noting the sediment basement contact (and what we interpret as a large fault breccia) on the way.  When into the granitic basement there are many mafic dikes, some locations even have dikes crosscut by later intrusions.  The students this year really seemed well prepared to tie the geology into their reports and were very careful in noting/interpreting features.  Next we drove to Tunnel Drive, a short hike that exposes lots of basement deformation and some classic fault examples.  There were also a couple fun stops like Skyline Drive where dinosaur footprints have been preserved as trace fossils.  In the picture below we are looking up at the bottom on an impression likely left by a foot of an ankylosaurus.

The next three days the groups rotated through the geophysical methods.  In this post I'm only going to discuss the GPR collection and data.  The gravity data is currently being processed (so expect a post about it early next week) and the magnetics are posing problems.  Our main magnetometer has an internal problem that prevents us from downloading the data collected.  It is being sent back to the factory and the students will collect new data with an older system next week.  There is also a special magnetic surprise I found in an outcrop that I want to discuss in a more detailed post.

Ground penetrating radar is a technique we haven't really used much recently at OU, but I'm hoping to make a come back with it! The system needed lots of tweaking, adjusting parameters, and fiddling with; after that it obtained some really interesting data.  A ground penetrating radar sends a signal into the rock, which is reflected from various objects/interfaces, so data is interpreted similar to seismic data (only at a different time scale).  Seismic waves travel through rock at around 2200km/second while radar waves are much faster at about 0.1m/nanosecond.  GPR is used extensively in archeology to look for near surface targets and to find bodies during criminal investigations (we have in fact used this system over a mass grave before in Norman... but that's another post all together).

The first day we had students experiment with different parameters over a known target (a metal culvert under a road).  While the target isn't necessarily geologic, we know what it is, where it is, and how big it is.  Using this we setup an ideal parameter set to then examine more interesting geologic features.  Other groups during the week also targeted the culvert for practice, then picked more interesting areas to examine.

First I had to patch together some codes to convert the GPR data from the proprietary DT1 format to a more standard SEGY format.  We then worked up some seismic unix command flows to process that data.  The images shown are not migrated and could benefit from migration, spiking deconvolution, etc.

The first image shown is on the high camp road.  There was a culvert near the surface, but below that are other diffractions from some interesting geological structures.  I'll currently not say any more so students can think about what these are.  The second image shows why this tool could be so valuable.  There was little geology at the surface, but according to the data there is a dipping reflector just under our feet.  What could it be? Maybe with a few more trips up there I'll be able to find it in outcrop somewhere.  There were also some diffractions deeper in this image.  While I do have lots of comments about the GPR parameters, setup, etc I don't think it's so important to discuss.  My goal is to show that there is so much beauty in the complexity of what happened here.  The basement rock is very very old (without an extensive literature search we'll say pre-cambrian, which is ~540 Million years ago).

Friday we took the students on another field trip.  Early in the morning I had to take our other TA, Cullen Hogan, to the airport.  He is leaving us for an internship and will be greatly missed in the last week of the course.  After returning from the Colorado Springs airport the students piled in to drive to one of my favorite views in southern Colorado, Spiral Drive in Salida.  On the way to Salida from Cañon City small sedimentary 'hanging basins' can be found in the mountain sides as we drive through a thrust zone between sediment and basement.  Salida lies in the San Lúis Valley, part of the slow Rio Grande Rift.  The view is always amazing and some complex geology is observed on the way.  Below is a panorama overlooking the collegate peaks I took at this location last year (there wasn't as much snow this time).

Teaching Field Camp Week 1 - Norman, OK

For the next 3.5 weeks I'll be a teaching assistant for the University of Oklahoma geophysics field camp.  The point of the camp is to teach senior geophysics students how field data is collected, processed, interpreted, and applied to the problem.  This is an important capstone class because prior to now students just see geophysical data as equations, numbers, and options in software and on paper.  Now they must hike in the field, observe the geology, collect the data, and finally figure out what it all means.

Week 1 was done in Norman, OK back at the school.  Monday the students listened to lecture on geophysical methods, were introduced to the equipment, and finally were tasked with using differential GPS on the North Oval of campus.  Differential GPS is much more sophisticated than the GPS in your car.  Each unit costs ~$80,000, and one is mounted on a tripod and remains stationary throughout the day.  This station is referred to as the base, and is the most crucial link in any geophysical survey.  The second station is mounted in a backpack and is the rover.  Students walk around with the rover collecting data points, then at the end of the day the base station is used to calibrate the rover data.  We know the base station doesn't move during the day, but it appears to in the data.  This is because GPS locations are highly susceptible to changes in atmospheric humidity, irregularities in the satellite orbits, and a number of other factors.  Without going into more detail, look below at the Excel plot of the oval before and after correction.  Data points are much closer (within centimeters) after correction, and those centimeters make all the difference in some survey environments.  This plot came from one of our students reports that was turned in during the week.

The next objective was to collect a seismic line over a branch of the fault system that slipped during the earthquake sequence of November 2011 in central Oklahoma.  Setting out a seismic line is a long, arduous task, so the students needed a practice day.  We setup a short (~300m) line by the school's duck pond.  Below is a time-lapse video I took of the practice session on Tuesday.

The next two days were collecting the real data in Prague, OK with Friday reserved for processing.  Without going into great detail of how we setup and collected that data I'll say that 72 geophones were deployed every 10m.  Geophones are small seismometers effectively that only measure the motion of the ground in one direction (up and down in this case).  After processing the data we get an 'image' of what's going on underground.  Are the rocks bent (folded), broken (faulted), or otherwise layered/interesting.  We expected to cross the branch of the fault responsible for some of the stronger aftershocks.

Below are some of the processed images from a student.  This is a rough processing and can be improved with more time, but that is beyond the scope of what is expected in the field.  The faults are marked by yellow lines and indicated places were the rock has broken and slipped.  Also notice the folded layers to the left of the section.  More work and interpretation is needed to obtain further geologically useful interpretations.

Expect more posts as we re-group in Cañon City, CO and begin working on gravity, magnetics, and ground penetrating radar.

Laser Cave Profiling - The Beginning

Inspired by caving friend Nathan Williams photos of this technique I decided to try to duplicate his results and then write some great software.  The idea is to make profiles of cave tunnels known as cross sections very easily and accurately.  Cross sections are commonly sketched by a cave mapper by eye with a very rough scale.  Sometimes the passage is measured in height and width with a tape.

Here we use a motorized laser level and a DSLR camera to try to construct profiles.  After seeing Nathan's photos I got the laser level from Harbor Freight Tools (~$60) and used my Nikon D40X in a local Arkansas cave.

Today I just did a quick test about 100 ft. into the passage.  Below is a picture looking toward the level with flash so the tunnel profile can be seen.  Then I did a 20 second exposure with the level running and all lights off.  There was a small amount of light from the entrance, but negligible.

I then read the image into python, remove tripod reflections by subtracting the average of the blue and green channels from the red and then inverting the resulting monochrome image.  The result is seen below:

The big thing I need is the software to then produce a set of points that describe the profile so I can implement routines to compute area and make a pseudo 3-D model of the cave by stacking many closely spaced profiles.  I also tested the scale of the image by counting how many pixels wide the level appears and then determined the pixels/cm count to get the size of the tunnel.  This process will be improved and automated as the software develops.

I'm open to suggestions from cavers and numerical methods folks.  I have a contouring algorithm (Moore-Neighbor Tracing) coded, but it doesn't handle the breaks in the profile.  Any ideas on making it continuous and possibly minor smoothing? I plan to build a "T" shape device with 4 dim LEDs to provide a larger scale target.

Field Camp - The Final Week

The final week of field camp consisted of a swap between geology/geophysics students, preparation of final reports, and a final presentation.

For the first day (Monday) of the geology/geophysics swap I was helping the geologists with my homebrew resistivity rig.  After some small problems in the morning the device cooperated, and we took a like across a fault, seeing massive jumps in conductivity over the gouge area.  The second day I was actually out with the geology professors hand mapping some of the surface geology in the area.  Tom and Neil were very instructive and were able to measure a strike and dip on things that very few would term 'outcrop'.  Nonetheless the data plotted nicely!

After the mapping came independent projects and final reports.  Cullen and I decided to collect a gravity line across the dry union fault near Salida (the area of the first field trip).  I ended up staying at camp to help the geologists process their data and Cullen went with Guang to collect the line.  The results were stunning and the calculated fault dip angle is 87 degrees.

Processing the magnetic data was quite a challenge.  To take the data we place flags along the path we walk, take their coordinates and press mark at each flag.  The instrument is collecting a magnetic reading every 1/10 of a second.  I ended up writing code that assumes a constant walking place between flags and linearly interpolates positions between.  The code then re-writes a new datafile that can be plotted by OASIS.  The quick code hack was not perfect and really should have already been in the software that came with the instrument.  Hopefully over the summer I'll have time to perfect the code and write a nice GUI to go along with it.  (Error checking would also be nice)

Finally on the last day of camp we had to give a presentation of the results.  Cullen and I talked for about 40 minutes and then there was much discussion between the faculty of our image.  We had everybody excited about what we should try next year!  Unless plans change it is likely that Cullen and I will TA next year.

Now I'm at NASA in Houston, TX.  Towards the end of this week I'll start a weekly post about the work here.  It's very exciting work with a flying vehicle and guidance software.  Stay Tuned!  Below are a few pictures from the group trip to Pike's Peak.  A copy of the final report can also be downloaded HERE.

Week 2 (Seismic Week) - Field Camp 4

This week was seismic week for us here in Canon City.  We carefully selected a site that crosses from sediment into basement, but the nature of the contact is unknown.  It ran across the property of a nice couple who moved here from Iowa three years ago.  They are interested in the geology and were more than happy to have us tramp all over with magnetic, gravity, and finally seismic gear including a larger thumper mounted on an ATV.

The first part of the week involved Cullen and I working on a mounting system to attach the thumper for the four-wheeler.  Seismic surveying works on the premise that different rocks have different wave velocities as a function of the type of rock, fluid content, etc.  We set out a long line of geophones (basically a vertical seismometer) and then hit the ground very hard to induce a signal.  From the return of the signal we can learn a lot about what the subsurface looks like.

For some surveys we hit the ground with a sledgehammer, shoot it with a gun, or even use dynamite! In this case we tried a new device that pulls a 40kg weight up with an electric motor and then drops it.  There is also a giant rubberband that accelerates the weight towards the ground.  There is currently a battle going on between naming the machine the seismic thumper device or the seismic thumper and utility device.  We added weights, battery mounts, and even a flashing safety light to the four-wheeler.

Before we could even use the thumper the control box failed due to a cable issue, so I had to rewire the control system (actually just a solenoid control) and mount the switch in a box on the ATV.  It was a midnight patch up, but it worked well all day!

The survey was laid out on Wednesday.  The line was almost 750m long, then we even rolled it forward! Geophones were placed every 10m and the thumper was shot at each geophone three times to 'stack' the data (this helps us reduce random noise).  We don't have any images yet, but tomorrow we begin processing.  The line took a day to layout, a day to shoot, and tomorrow morning to roll up.  Several long days for us here.  I also put together a quick video of the thumper shooting.

On a side note, we also took a great hike and field trip in the past week, so I've added a few photos of the Collegiate Peaks, and Tunnel Drive Trail.

Week 1 - Field Camp 3

Week 1 has been very busy and week 2 is almost to begin.  We were lucky with the weather, but this week looks to begin the inevitable warm up that we all knew would come.  This week the geophysics group went on a field trip to get the regional setting (Monday), learned detailed surveying with the TOPCON differential GPS (Tuesday), conducted a gravity survey, and a magnetic survey (days dependent on group assignment).  The week ended on Saturday with another field trip out west to see some different formations.

The regional field trip went well and we scrambled across some slopes to see most of the section that the geologists would be mapping and be very familiar with.  As a geophysics student I was more interested in the rock properties, what methods we could differentiate them with, etc.  This trip did help put things in a big picture geologic perspective though.

The differential GPS surveying went well despite a few equipment setup issues, which were to be expected with new users.  The basic premise of the system is to leave a very precise GPS unit in place all day while another identical unit is used as a rover.  The two data sets can then be merged using the base to correct for signal attenuation by the continually changing atmosphere and other error sources.  In general sub-centimeter accuracy is achievable.  This accuracy in elevation is especially important in gravity data processing since 1m makes .3086 mGal difference in the data.  While some complain that taking 2 minutes to get a GPS fix is unreasonable I remind you that we are getting a very accurate position on an irregularly shaped rotating planet FROM SPACE... it's amazing it dosen't take longer.

The gravity survey looks at density differences in the subsurface while the magnetic survey examines differences in magnetic susceptibility.  We are interested in contracts between sediments and basement or with a dike especially in this area.  After the processing I will post some results, but I know the magnetometer went crazy when I passed over the suspected location of a large dike.  The gravity survey should also be helpful, but the gravimeter does instill a certain amount of fear in everyone since it is ~$100,000 and VERY easy to break.  Omar is modeling the magnetometer in this picture.

Finally, we went on another trip Saturday which involved me getting some nice rocks with chlorite in them for bookends from a tailings type pile in a field.  This week will be seismic week, so stay tuned for updates and pictures of our new (hopefully) 700m long seismic line!