If you've been following my drone work through Servo or on social media, you have probably seen me posting pictures of the tiny Cheerson CX-10 quad. You can pick them up for ~$15 on Amazon and have hours of fun. As you can imagine, there is a fair share of crashing at first while getting used to the response of such a small vehicle. After a few run-ins with the wall, I could fly it pretty well though. I picked up a couple more, including a model with a camera. Amazing for the price. A couple of weeks ago there was some random falling out of the sky behavior, followed by the realization that one of the props on two of the three quads was not turning anymore. I checked for any hair/carpet wrapped on the shafts, but they were clean.
I needed to repair the quads as I'm working on a little project modifying their controller for a future Servo article (preview photo below). Sure, they are cheap enough that they are almost disposable, but I figure if nothing else I could swap some parts to get at least one working vehicle out of the two. Time to crack it open!
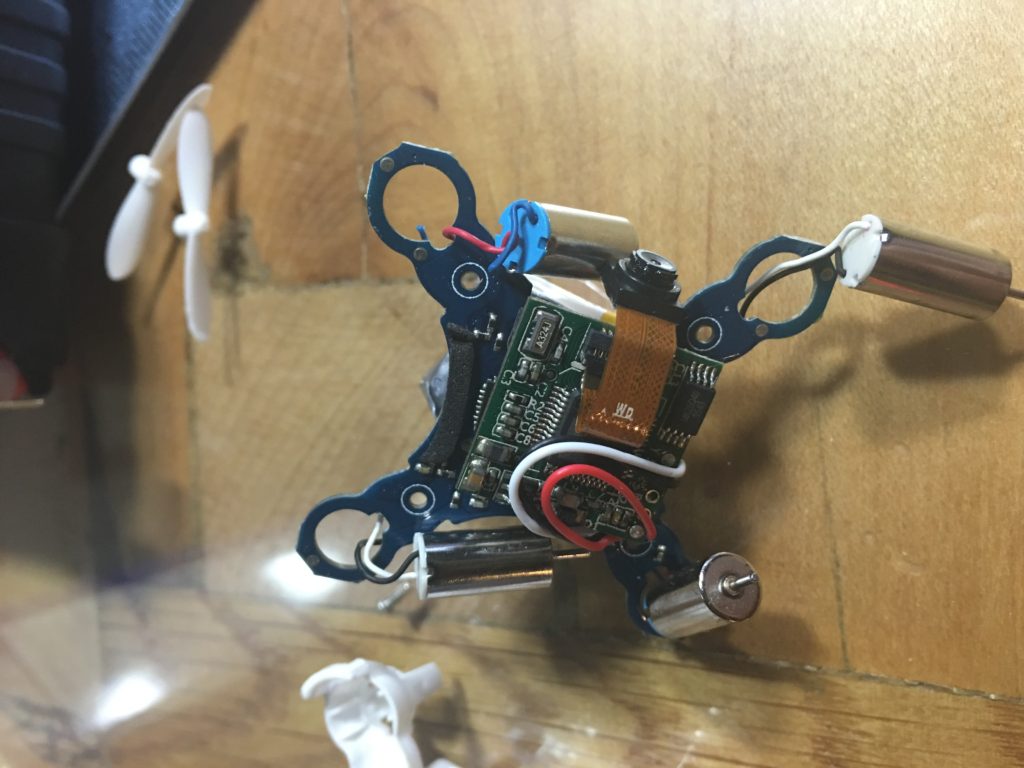
There are four small screws holding the plastic half-shells together. After removing those and placing them in a container for safe-keeping I gently pried open the plastic clips at the end of each motor extension arm. This was easy to do with just my fingernails. The two parts of the case came off and I was staring at the printed circuit board. (Side note: the camera is some module they just tacked on, so I just pushed it out of the way and ignored it.)
The problem was immediately obvious - the ground wire to the nonfunctional motor had been severed. Looking at a few other wires, it looks like they commonly get pinched in the enclosure during assembly. After repeated run-ins with objects, the wire was eventually sheared.
Using a little bit of magnet wire and a magnifier I was able to splice in a new section of wire. I was startled when the motor somehow jumped to life as the free end of the magnet wire swept across the PCB during the repair. I insulated it with a bit of electrical tape. The tape prevented me from inserting one of the four screws upon reassembly, but so far that doesn't seem to be a problem. Putting things back together took just a few minutes and I was happily flying again!
The moral of this story is that if you have one of these little quads and it seems to have died, go ahead and open it up! If the problem comes back, I may buy some extra motors or start a parts pool from other quads. Looking at the construction of the quad was a bit scary though - I think they will live in my LiPo fire safe now.
If you want to know more about how these little quads work, checkout these blog posts by Elecia White in her toy teardown series. Also, if you haven't listened to the podcast Elecia and Chris host "Embedded.fm" and you're reading this, you would probably enjoy it!
See you in a couple of weeks with a revisit of a popular myth we tested about a year ago!


2 responses to “Cheerson CX-10 Motor Repair”